Project Case Study

UI Kit PSD to HTML/JS conversion

PSD to HTML conversion of UI Kit project including custom JS work ( charts, AJAX, drag & drop, sorting, searching, autocomplete, etc. ), responsive work, retina support and custom animations.

  • HTML5 / CSS3
  • Responsive
  • Custom Animations
  • Parallax
  • Charts
  • AJAX
  • Drag & Drop
  • JSON and CSV data loading
  • Searching
  • Autocomplete
  • Sorting
Preparation

Design

There were 4 PSD files - index, drag & drop page, form page and table. All global state elements like dropdowns and navigation states were added in the index page. All inner pages also contained additional design elements like edit states, thumb/list views, drag & drop states.

Design

Requirements

The only initial requirements for the project were that it had to be converted from PSD to HTML and we had to use JS for the functionality.

However, our client hadn't provided details specifying which elements should be made functional and which not. He just provided us with a list of the code features he needed:

  • JS charts
  • Table sorting
  • Table search
  • Autocomplete
  • JS validation
  • Drag & drop
  • Custom Google map

Clearing up the details

In order to provide our client with estimates, we had to discuss the details a little more.

We prepared a summary of the project which described how we would handle the JavaScript features that were requested.

We explained which libraries we would be using and how we would be loading the data for the charts and tables.

Although most of the requirements were clear, there were some things that our client hadn’t mentioned. We had to discuss the following:

  • How the drag & drop was supposed to function?
  • Where were we supposed to install autocomplete and where were we expected to implement an actual search?

And we started...

The time frame for the project was 8 Business Days

Management
Step 1

Management

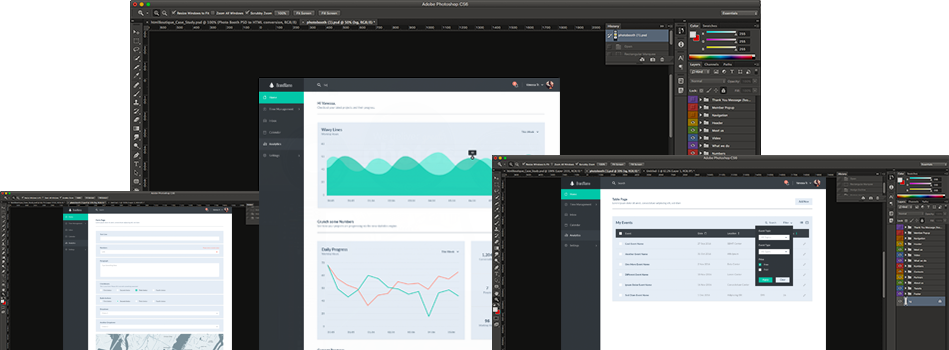
The project was actually split in 2 parts - HTML/CSS building and advanced JavaScript development. We split the project and assigned it to 2 different developers. The first developer was a senior HTML/CSS coder and the second one was a senior JavaScript developer.

Slicing
Step 2

Slicing

We sliced the images and exported them as @1x and @2x sprites for non-retina and retina displays respectively. There were only a few images for slicing. We implemented most of the icons as fonts.

Step 3

HTML Coding

We coded the HTML according to the requirements. We used HTML5 tags and strictly followed our coding standards. The HTML and JS developers discussed the complex parts. They decided that the HTML developer would be using placeholders on the sections with charts and other JS features.

Step 4

CSS Coding

For the CSS building we decided to use PostCSS. This super fast CSS preprocessor was great for this project since it was very simple and clear.

Responsive version
Step 5

Responsive version

The project was pretty straight-forward in terms of responsiveness. For the navigation we built a burger menu with a subtle sliding animation. Along with the animated sidebar, we also decided to animate the burger button to a closing icon so it was more user-friendly.

Project preview
Project preview

Most of the sections were pretty standard and we just split them into 1 or 2 columns for the mobile view. We also tested all buttons and made sure that they were easily clickable.

Step 6

Animations and advanced JS work

The JS development began right after we finished with the HTML and CSS coding. The developer and the manager discussed everything. The hard work was about to begin!

The JS developer analyzed the modules that needed to be done and started building the skeleton.

Project preview

By following the client's instructions and the project summary, the JS developer built all the functionality. There were a few plugins that we used, but most of the work was custom. We used different techniques for achieving the different goals.

There were different functions that we used for loading data via AJAX and for drawing the results into charts. You can see the JS code here.

Step 7

Fine tuning and QA

The project didn't have to be pixel perfect but it had to be perfect in terms of functionality. Therefore, we tested every single JavaScript function a few times with different data in order to ensure that everything worked perfectly.

Once everything was completed, the developers passed the project to our QA (Della) and discussed what had to be tested.

Della made a lot of tests, including tests on different devices to make sure that everything worked exactly as expected.

She spotted a few issues and wrote them down. These were very small bugs but they were affecting the overall user experience.

She passed her comments to the developers. They solved all issues and made the final touches.

After that, Della reviewed everything one more time and confirmed that all of the updates were properly done.

HTML/CSS preview
Voilà!

The project is ready!

Check out the video below the see the whole thing in action

Project preview
Delivery

All the hard work is done

We built the PostCSS modules and uploaded the project to our preview server. Our client received a responsive, JavaScript-heavy website, ready for use.

Overall

Project Estimate

Price:
$1566.00
Timeframe:
8 Business Days
Previous / Design Agency

PSD to HTML conversion of 4 pages including responsive work, retina support, custom animations, parallax effects and some more JavaScript features.

  • HTML5 / CSS3
  • Responsive
  • Parallax
  • Custom Animations
  • Counters
  • Content filtering
Next / Photo Booth

PSD to HTML conversion of a one-page Bootstrap project including responsive work, retina support, custom animations and parallax effects.

  • HTML5 / CSS3
  • Responsive
  • Bootstrap
  • Custom Animations
  • Parallax
  • Counter
Project preview

This Is Our Web Let’s shape it together!

© htmlBoutique 2008-2024. All Rights Reserved